Triggers
Every workflow starts with a trigger. The trigger defines what event starts the workflow and what data it passes to the first action.
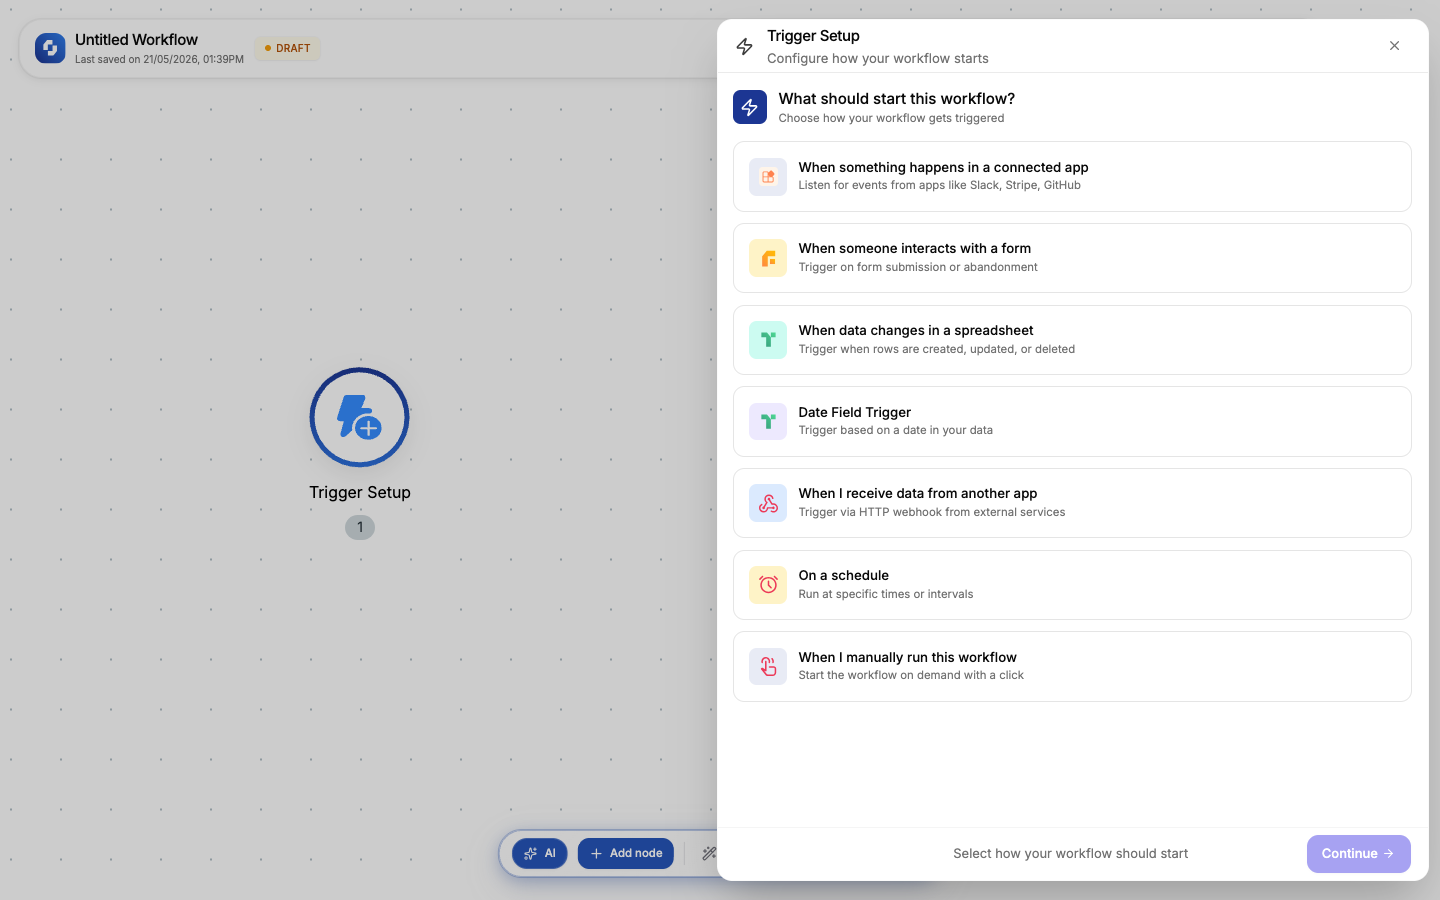
When you create a new workflow, you see a Trigger Setup node in the center of the canvas. Click it to choose your trigger type.
The 7 trigger types
TinyWorkflows supports 7 trigger types, organized into 5 categories:
| Category | Trigger type | What starts the workflow |
|---|---|---|
| Connect an App | App Event | Something happens in a connected app (new Slack message, Stripe payment, GitHub PR) |
| Tiny Forms | Form Submission | Someone submits one of your TinyForms |
| Spreadsheets | Spreadsheet Change | A row is created, updated, or deleted in a TinyTable |
| Spreadsheets | Date Field Trigger | A date column in a TinyTable reaches a threshold (e.g., 1 day before due date) |
| Webhooks | Incoming Webhook | An HTTP request hits your unique webhook URL |
| Schedule & Manual | Scheduled Run | A cron schedule fires (every 15 min, daily at 9am, weekly, etc.) |
| Schedule & Manual | Manual Run | You click "Run" in the canvas toolbar |
Choosing a trigger
When you click the Trigger Setup node, a drawer opens with two tabs:
- Choose Trigger: pick your trigger type from the categories above
- Configure: set up the trigger's specific options (webhook URL, schedule, form, etc.)
Some triggers (like Manual Run) need no configuration: just select and save. Others (like Scheduled Run or Incoming Webhook) have detailed configuration panels.
Quick templates
For fast setup, 6 pre-built templates are available:
| Template | Sets up |
|---|---|
| Manual Start | Manual trigger, no config needed |
| Daily at 9 AM | Schedule trigger at 9:00 AM UTC |
| POST Webhook | Webhook trigger accepting POST requests |
| Form Submission | Form trigger (pick a form) |
| New Sheet Row | Sheet trigger on row creation |
| Date Reminder | Date field trigger with offset |
How triggers work
- You select a trigger type and configure it
- Click Save & Close; the Trigger Setup node updates to show your chosen trigger
- When the trigger event occurs, the workflow fires
- The trigger passes its data to the next node as variables (e.g.,
{{trigger.body.email}}) - All downstream nodes can reference the trigger's output
A workflow can only have one trigger. If you need multiple entry points, create separate workflows. Each workflow = one trigger = one automation path.
Not sure which trigger to use? Here's a quick decision guide:
- External app sends events? → App Event or Incoming Webhook
- Need to run on a schedule? → Scheduled Run
- Form data triggers the workflow? → Form Submission
- Spreadsheet data changes? → Spreadsheet Change or Date Field
- Just testing or running manually? → Manual Run