Getting Started
This guide walks you through creating your first workflow. By the end, you'll have a working automation that fires when an event happens and takes action automatically.
What you'll build
A workflow that connects a trigger to an action on the canvas, then publishes it to run automatically. This covers the three core steps: trigger → action → publish.
Open the platform
- Log in to app.tinycommand.com
- You'll see the Home screen with Quick Actions
Create a new workflow
Click Workflow in the Quick Actions row. A dialog opens with two options:
- Start from scratch: empty canvas
- Templates: pre-built workflows you can customize (Lead to close, Approval flow, Notifications, Data sync)
You can also Build with AI: describe what you need in plain language and AI generates the workflow.
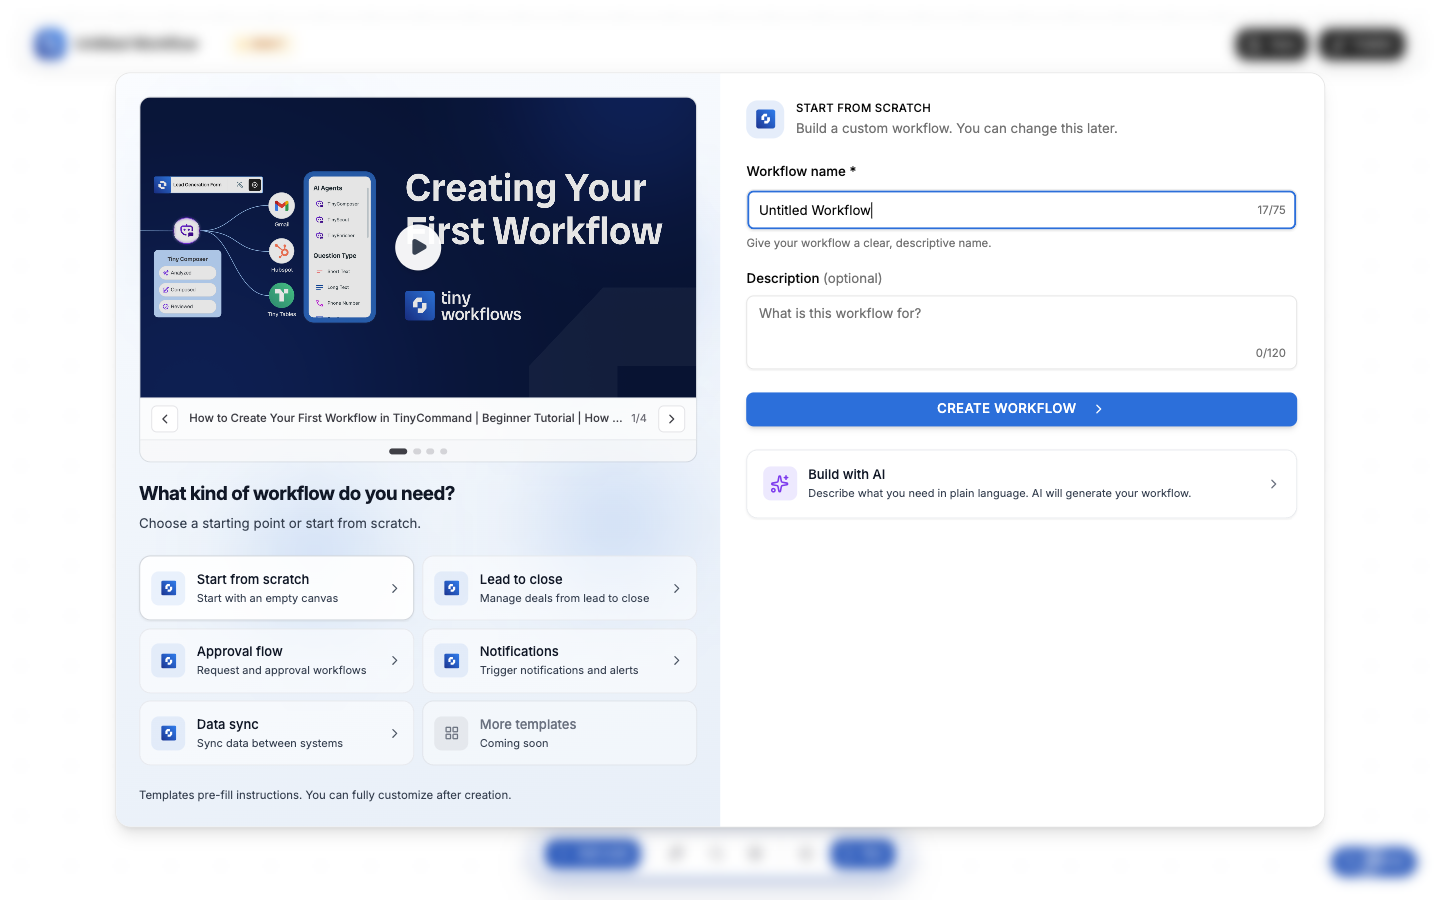
Give your workflow a name (or keep 'Untitled Workflow') and click Create Workflow.
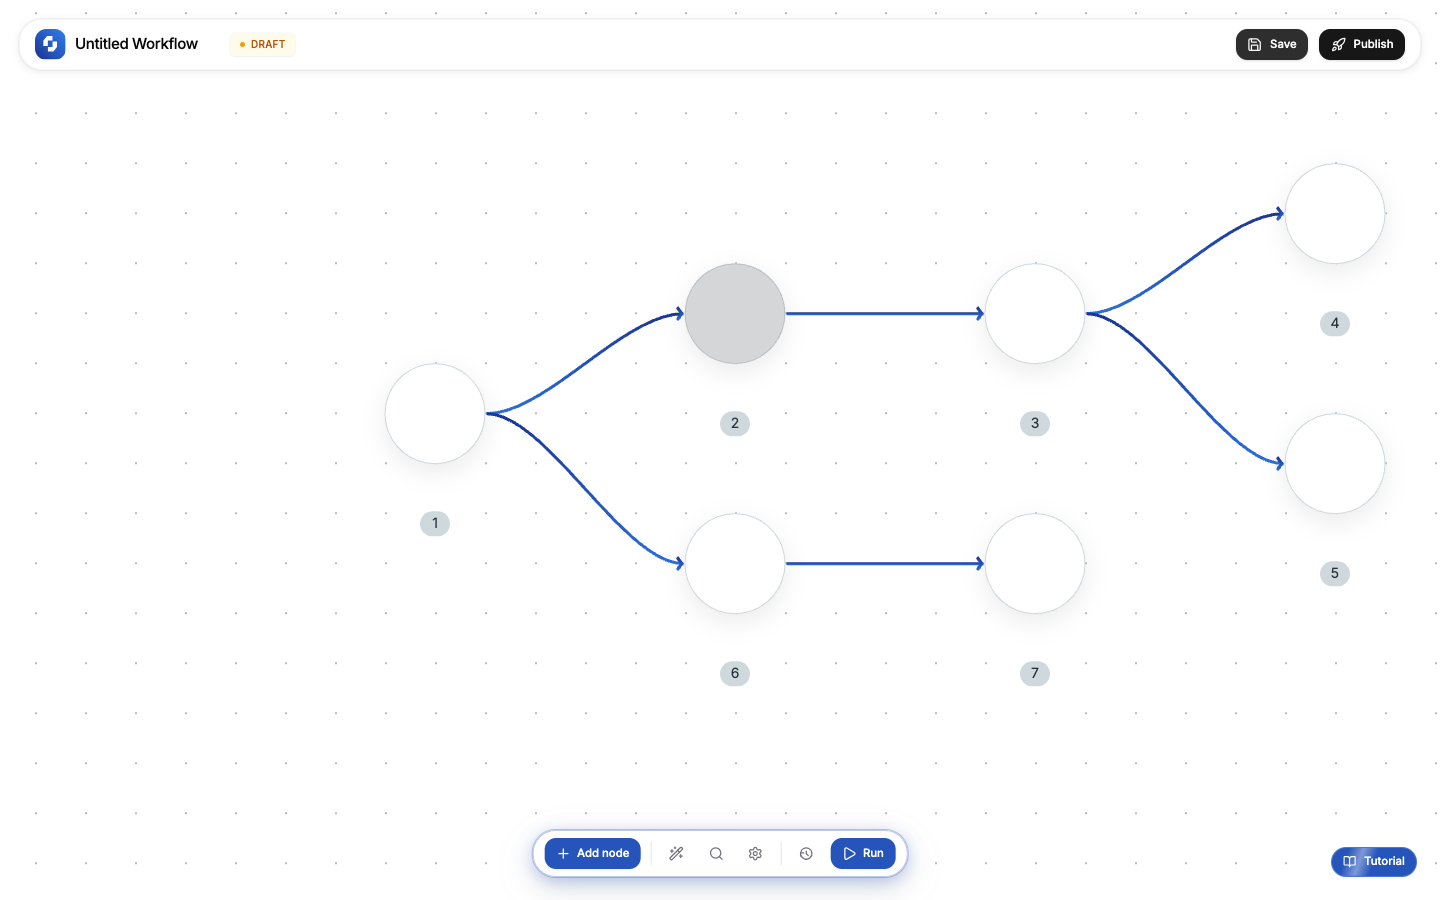
The canvas
You'll land on the workflow canvas. This is your workspace for building automations.
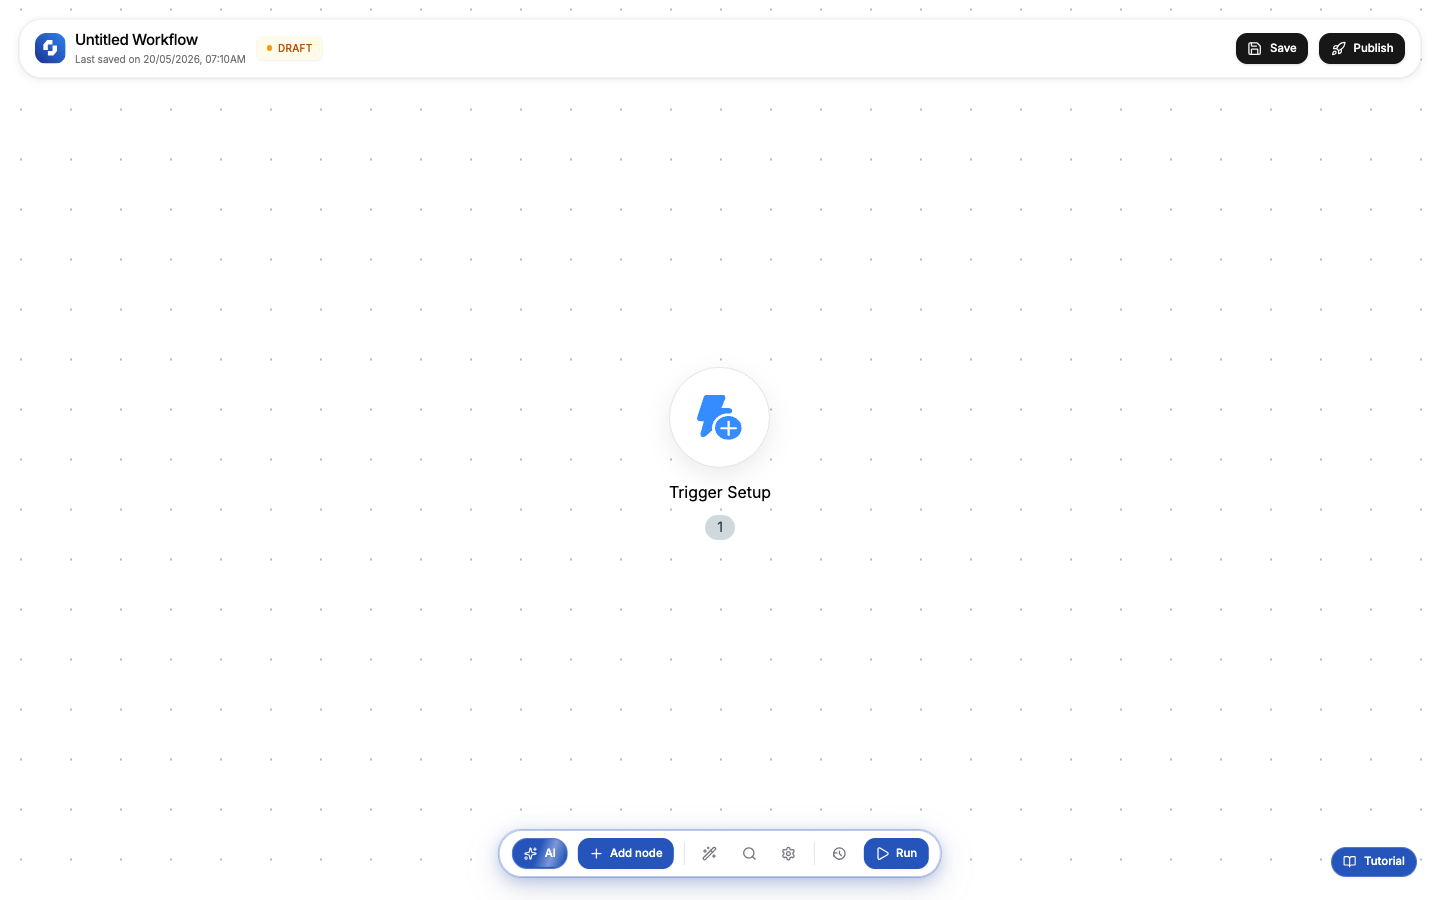
Key areas:
- Top bar: workflow name, DRAFT/Published status, Save and Publish buttons
- Canvas: drag-and-drop workspace where you build your workflow
- Bottom bar: AI assistant, + Add node, search, settings, execution history, and Run button
- Trigger Setup: the starting node that defines what kicks off your workflow
Add nodes
Click + Add node in the bottom bar to open the node panel. You'll see every node type organized by category:
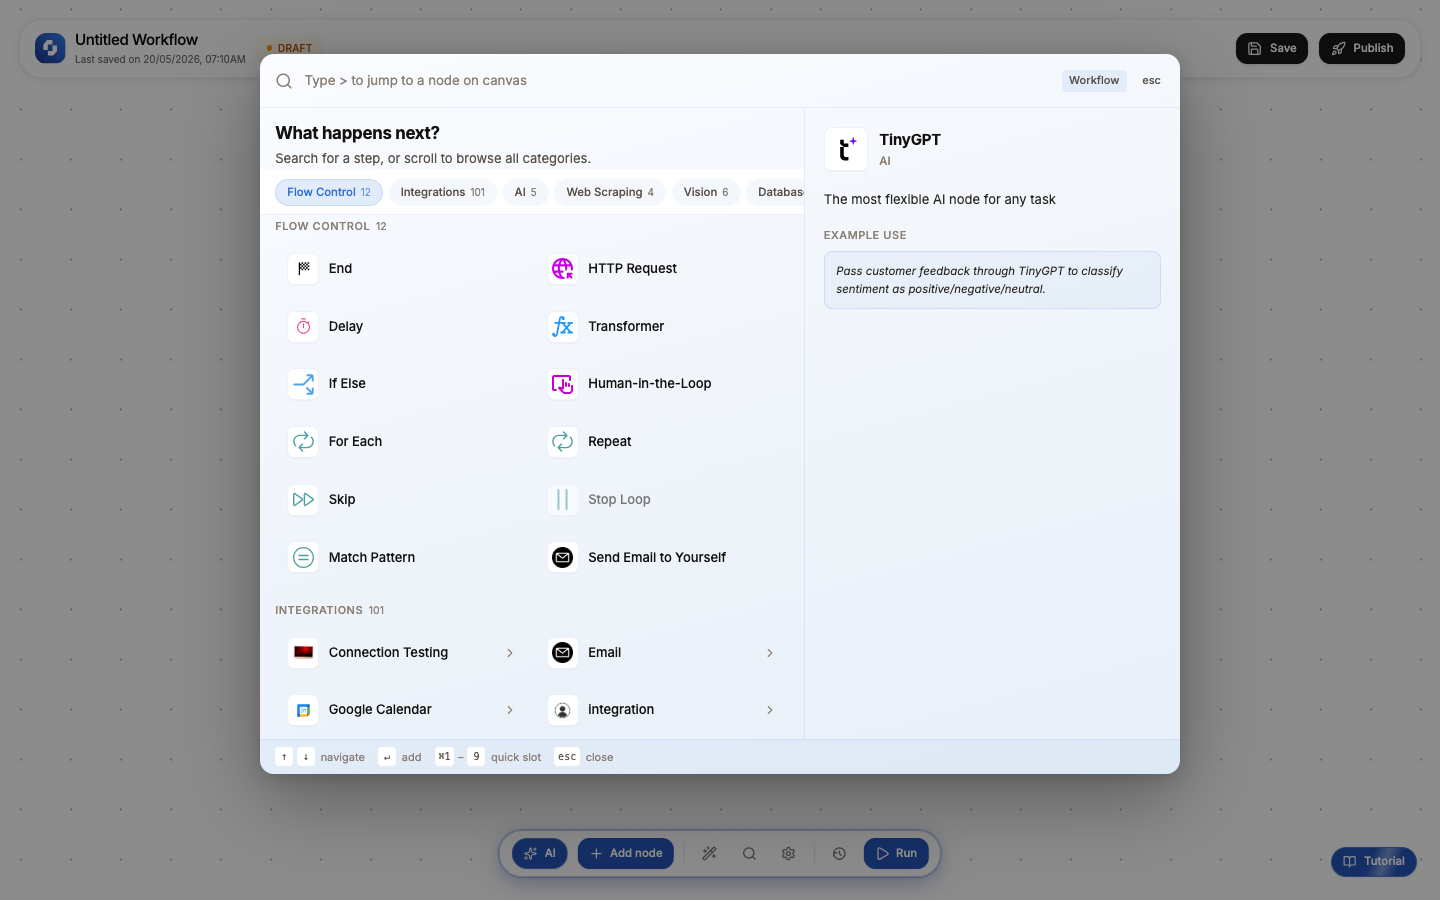
Categories include:
- Flow Control (12): If-Else, For Each, Delay, HTTP Request, Transformer, and more
- Integrations (101): Slack, Gmail, Google Sheets, HubSpot, and 97 others
- AI (5): TinyGPT Analyzer, Writer, Researcher, and more
- Web Scraping (5): Extract data from web pages
- Vision (6): Document and image processing
- Database: Query and update databases
The right side of the panel shows a preview of the selected node with an example use case. Hover over any node to see what it does before adding it.
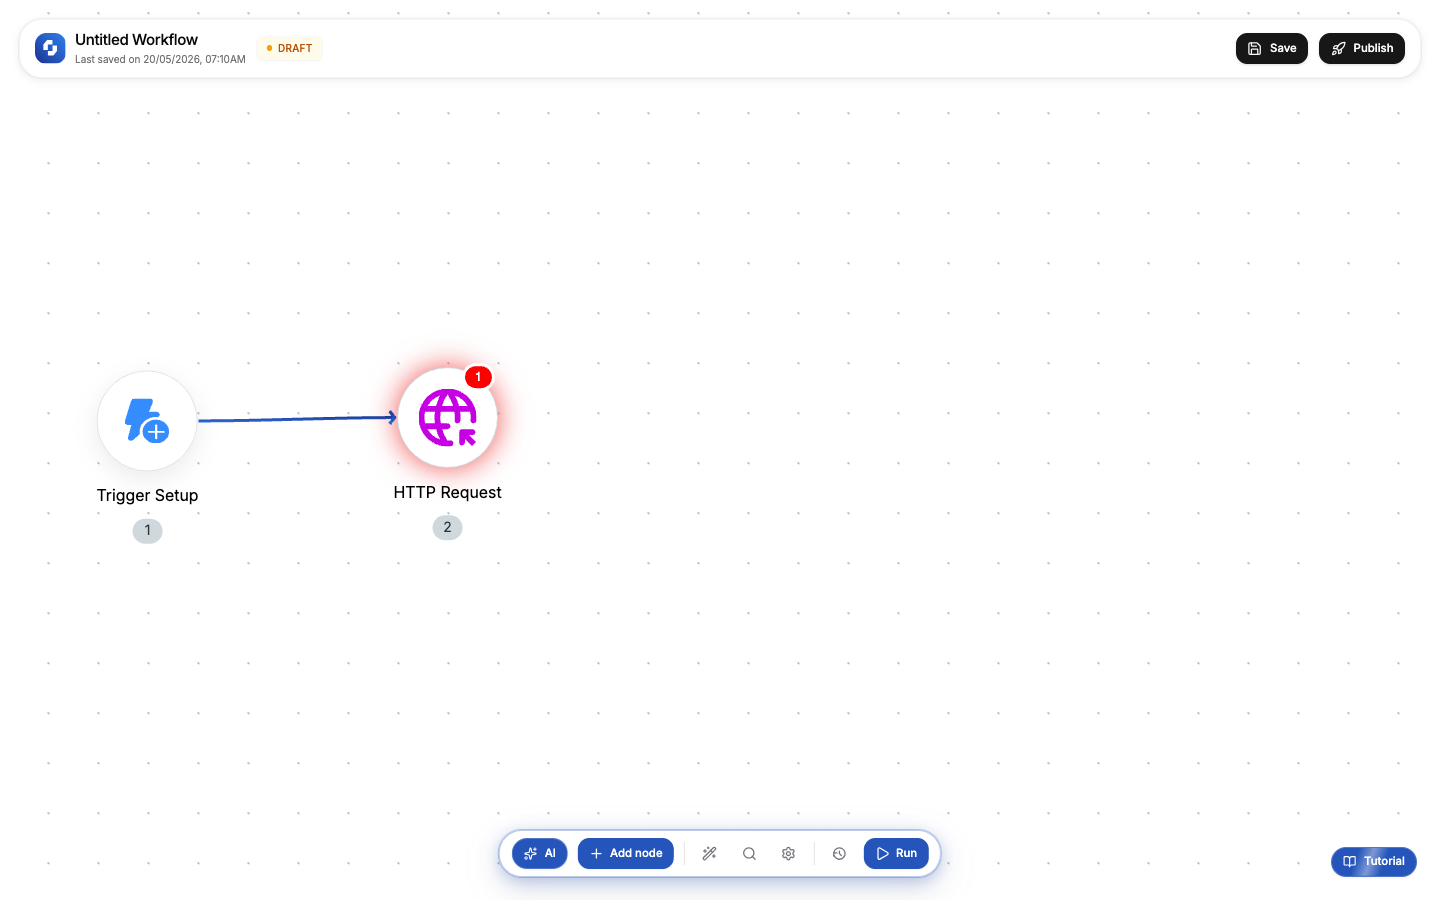
Connect nodes
Once you add a node, it appears on the canvas connected to the previous node with an arrow. The arrow shows the direction data flows, from trigger to action.
Test your workflow
Click the Run button in the bottom bar to test your workflow. Each node executes in order, and you can see the results in the execution visualizer.
Test runs use real credentials and real APIs. If your Slack action is configured, it will actually post to your channel. Use a test channel while building.
Save and publish
- Click Save to persist your workflow as a draft
- Click Publish to make it live; the status changes from DRAFT to Published
- Your workflow is now active and will fire whenever the trigger event occurs
You can unpublish anytime by clicking Publish again. This pauses the workflow without deleting it.
What's next
- Canvas overview: learn the full canvas UI
- Triggers: webhook, schedule, and manual trigger types
- Variables: how to pass data between nodes
- If-Else branching: add conditional logic